Has your ceiling fan light suddenly gone dark, leaving you in the literal dark? A non-functioning ceiling fan light can be a common frustration, especially when the fan itself continues to spin without issue. This problem often signals a minor fault, but electrical problems can be daunting if you’re not sure where to start. This comprehensive guide will walk you through troubleshooting a ceiling fan light that won’t turn on, offering clear, step-by-step solutions to help you restore illumination and comfort to your space. You’ll learn how to identify common culprits and apply effective fixes, ensuring you can tackle many problems yourself before needing professional help.
Essential First Steps: Safety and Basic Checks
Before you begin any troubleshooting, safety is paramount. Working with electricity carries inherent risks, so taking the proper precautions is crucial. A systematic approach to checking the most common and simplest issues can save you significant time and effort.
Prioritize Safety: Disconnect Power
|
Our Picks for the Best electric fan in 2026
As an Amazon Associate I earn from qualifying purchases.
|
||
| Num | Product | Action |
|---|---|---|
| 1 | Amazon Basics 20\" High Velocity Industrial Fan, Floor Fan, with 3 Speeds, Tilt Head, ETL-Listed Safety Compliance, Metal Housing/Blades, Ideal for Industrial/Commercial Space/Garage/Gym, 125W, Black |

|
| 2 | Dreo Tower Fan for Bedroom, 25ft/s Velocity Quiet Floor Fan, 90° Oscillating Fans for Indoors with 4 Speeds, 4 Modes, 8H Timer, Standing Fans, Bladeless Fan, Black, Nomad One (DR-HTF007) |
|
| 3 | Dreo Tower Fan for Bedroom, 90° Oscillating Standing Fans for Room with 4 Speeds, 3 Modes, 28dB Quiet for Sleep, 25ft/s Velocity, 8H Timer, Remote, Living Room, Office, Home, Black |
|
| 4 | Amazon Basics 16\" Pedestal Fan with Remote, Floor Fan, Standing Fan for Bedroom, Living Room, Office, with 3 Speeds, 3 Modes, Timer, Dual-Layered Blades, Adjustable Height, Tilt Head, 60W, Black |
|
| 5 | 10\" Modern Standing Fan for Bedroom, Sleek Oscillating Pedestal Fan, 3-Speed & Height Adjustable Compact Floor Fan for Home Office & Dorm |
|
| 6 | Dreo Fan for Bedroom, 12 Inches, 70ft Powerful Airflow, 28db Quiet Table Air Circulator Fans for Whole Room, 120° Adjustable Tilt, 3 Speeds, Desktop Fan for Home, Office, Kitchen |
|
| 7 | LEVOIT Tower Fan for Bedroom, 25ft/s Velocity Standing Fan with 28dB Quiet for Sleep, Remoter, 12H Timer, 5 Speeds, 4 Modes, 90° Oscillation for Home, Office, Indoor, Bladeless 36 inch, White |
|
| 8 | Dreo Fan for Bedroom, 120° Oscillating Standing Fans, Quiet Floor Fan with DC Motor, 100ft Pedestal Fans for Room, 9 Speeds, 4 modes, 20dB, 120° Manual Vertical, 37-42\" Adjustable Height, 9H Timer |
|
| 9 | Amazon Basics Air Circulator Fan, Desk Fan for Bedroom, Home and Office, With 90-Degree Tilt Head, 3 Speed Settings, Lightweight (3 LBS), 35 Watts, Black, 11.1\"W x 6.3\"D x 10.9\"H |
|
| 10 | Lasko 2520 Oscillating Stand Fan,White 16 Inch |
|
The very first and most critical step is to completely shut off the power to your ceiling fan. Locate your home’s main electrical panel and identify the circuit breaker corresponding to the room or area where the fan is installed. Flip this breaker to the “off” position. Do not rely solely on the wall switch, as power can still be present in certain components. Once the breaker is off, use a non-contact voltage tester to verify that no electricity is flowing to the fan’s wiring. This simple check can prevent serious electrical shock.
Inspect the Light Bulbs
Often, the simplest solution is the correct one. Light bulbs are consumable items and can burn out.
- Check for burnt-out bulbs: Carefully remove each bulb from the ceiling fan light fixture. Look for a broken filament inside the bulb or any darkened areas, which indicate it has burned out.
- Ensure correct wattage and compatibility: Replace any suspected faulty bulbs with new ones, ensuring they match the specified wattage and bulb base type for your fan’s light kit. Using incompatible bulbs can lead to flickering or even damage the fixture.
- Tighten loose bulbs: Sometimes, a bulb simply isn’t making proper contact. Gently screw each bulb firmly into its socket, but avoid over-tightening.
Test the Wall Switch and Pull Chain
Your ceiling fan’s operation depends on its control mechanisms. These can sometimes be the source of the problem.
- Check the wall switch: Ensure the wall switch controlling the light is fully in the “on” position. Sometimes, it might be partially flipped, or the switch itself could be faulty. If the switch feels loose or doesn’t click firmly, it might need replacement.
- For pull chain fans: If your ceiling fan has a pull chain to operate the light, give it a firm, steady pull. The chain mechanism can occasionally get stuck or break, preventing the light from engaging. Pull it several times to ensure it cycles through its settings.
Examine the Remote Control
Many modern ceiling fans feature remote controls for convenience. If your fan light is operated by a remote, these steps are essential.
- Replace batteries: Dead or weak batteries are a very common cause of remote control malfunction. Replace them with fresh ones and retest the light.
- Re-pair the remote with the receiver: Power outages or accidental button presses can sometimes cause the remote to lose its pairing with the fan’s receiver. Consult your fan’s owner’s manual for specific instructions on how to re-pair the remote. This usually involves pressing a combination of buttons on the remote and a button on the fan or receiver unit.
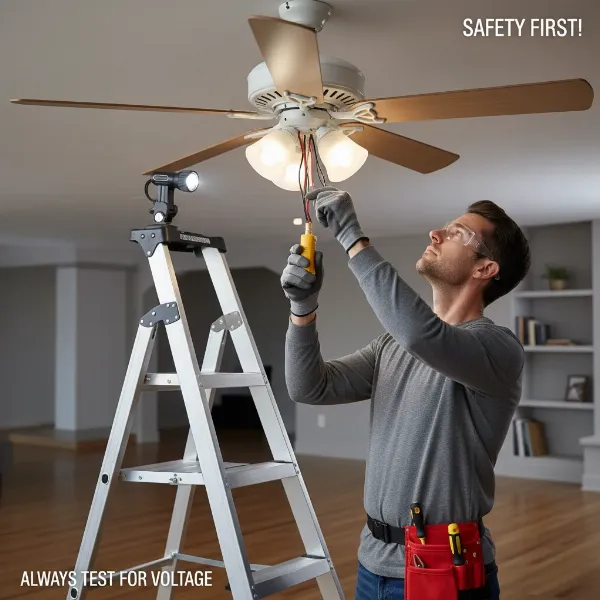 A person safely troubleshooting a ceiling fan light by checking bulbs with power off, screwdriver and voltage tester visible
Deep Dive into Electrical Connections
If the basic checks don’t resolve the issue, the problem likely lies deeper within the electrical connections of your ceiling fan. This phase requires a bit more hands-on work and attention to detail, always with the power safely disconnected.
Understanding Wiring and Connections
Ceiling fans have several layers of wiring, from the main house power to the fan motor and the light kit.
- Locate and inspect wiring: With the power off at the circuit breaker, you’ll need to access the wiring within the fan’s canopy (the cover against the ceiling) and potentially the switch housing. Carefully lower the canopy to expose the wire connections.
- Look for loose, frayed, or burnt wires: Inspect all wire nuts and connections for any signs of looseness, corrosion, fraying, or burn marks. Vibrations from the fan can cause connections to loosen over time. Burnt wires or a burning smell are serious red flags indicating a potential fire hazard and require immediate professional attention.
Troubleshooting the Light Kit Wiring
The light kit has its own set of internal wiring that can fail.
- Check for burn marks in bulb sockets: Examine the inside of each bulb socket for any discoloration or burn marks. This can indicate a short or an issue with the wiring directly supplying power to that socket.
- Ensure all wires are properly capped with wire nuts: All wire connections within the fan and light kit should be securely fastened with appropriate wire nuts. Loose caps can lead to intermittent power or complete failure.
- Address faulty wattage limiters: Some ceiling fans, particularly models manufactured by Hunter between 2009 and 2019, may include a wattage limiter designed to prevent over-wattage of bulbs. If this component goes bad, it can prevent the lights from turning on. If you suspect this is the issue, contact the manufacturer for replacement options, as bypassing it can be unsafe and void warranties.
Circuit Breaker and Power Supply
While you may have already checked the breaker initially, it’s worth revisiting if other troubleshooting steps haven’t worked.
- Reset tripped breakers: A circuit breaker can trip due to an overload or a short circuit, cutting power to the fan. Simply flipping it off and then back on can reset it.
- Identify low voltage issues: In rare cases, low voltage in your home’s electrical system can prevent lights from turning on or cause them to flicker. Diagnosing and fixing low voltage issues typically requires a professional electrician. If you’ve ruled out all other possibilities and the light still won’t work, this might be a deeper electrical system problem.
Advanced Troubleshooting and Component Checks
If basic and wiring checks haven’t yielded a solution, it might be time to consider internal components of the fan itself that could be impacting the light’s function.
The Role of the Capacitor
The capacitor is an electrical component vital for regulating fan speeds, but a faulty one can sometimes affect the light kit’s operation, especially if the fan is also showing signs of malfunction.
- How a faulty capacitor can affect light and fan function: A bad capacitor primarily affects the fan motor, causing it to run at only one speed, shut off unexpectedly, or not spin at all. While less common, in some integrated units, a severely failing capacitor could potentially disrupt the power supply to the light kit.
- Symptoms of a bad capacitor: If your fan is struggling to start, running slowly on all settings, or only working on its highest speed, a faulty capacitor is a strong suspect. While replacing a capacitor is a DIY possibility, it involves working with electrical components, so always exercise extreme caution and disconnect power.
When the Fan Works But the Light Doesn’t
This specific scenario is the most common and points directly to the light kit or its immediate power supply.
- Specific issues related to the light kit’s power supply: If the fan motor is running perfectly, but the lights remain off, the issue is almost certainly isolated to the light kit’s wiring, sockets, or a component like a wattage limiter within the light kit itself. Re-examine all connections specific to the light kit from the fan’s main wiring.
- Potential need for light kit replacement: If, after thoroughly checking bulbs, switches, remote, and light kit wiring, the lights still fail, the entire light kit assembly might need to be replaced. These kits are often modular and can be purchased separately from the fan motor. Ensure you choose a replacement light kit compatible with your specific ceiling fan model.
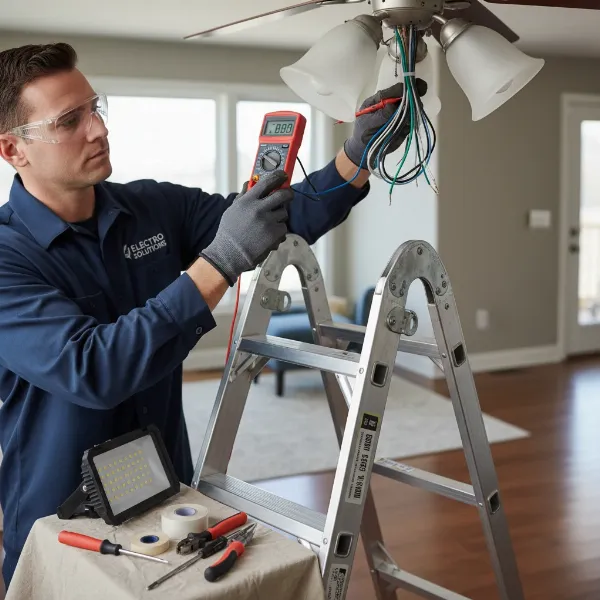 An electrician using a multimeter to test voltage in a ceiling fan's wiring with the light kit exposed
When to Call a Professional Electrician
While many ceiling fan light issues can be resolved with DIY troubleshooting, there are clear instances where calling a professional is the safest and most prudent course of action.
Recognizing Electrical Hazards
Your safety should always be the top priority.
- Burnt wires, sparks, burning smell: If you encounter any burnt-looking wires, see sparks, or smell burning insulation, stop immediately. These are signs of a severe electrical problem that could lead to a fire.
- Uncertainty or discomfort with electrical work: If you feel unsure about any step, uncomfortable working with wiring, or lack the necessary tools (like a voltage tester), do not proceed. Electricity is dangerous, and improper handling can lead to serious injury or property damage. “If you ever feel unsure, call a ceiling fan repair expert. This keeps you and your home safe.”
Persistent Issues and Complex Wiring
Sometimes, despite your best efforts, the problem remains unresolved.
- When DIY attempts fail: If you’ve gone through all the troubleshooting steps and your ceiling fan light still won’t turn on, a more complex underlying issue might be at play. A professional electrician has the tools and expertise to diagnose subtle problems that might be missed by the average homeowner.
- Dealing with older wiring systems: Older homes can have outdated or complex wiring that is more difficult to work with and potentially more hazardous. An electrician is trained to safely navigate these systems.
Warranty Considerations
Repairs can sometimes impact your product warranty.
- Impact of DIY repairs on warranty: Attempting extensive DIY repairs, especially those involving internal components or significant wiring changes, might void your ceiling fan’s warranty. Always check your warranty documentation before proceeding with complex fixes.
- Benefits of professional service for warranty claims: If your fan is still under warranty, having a certified professional perform repairs ensures that your warranty remains intact and that any necessary parts or labor might be covered at no additional cost.
Preventative Maintenance for Your Ceiling Fan Lights
Regular maintenance can significantly extend the life of your ceiling fan and prevent many common issues, including light failures. A little proactive care goes a long way.
Regular Cleaning
Dust and dirt are more than just unsightly; they can impact performance.
- Dust accumulation affects performance and balance: Dust and debris can accumulate on light fixtures, reducing light output and potentially insulating components, leading to overheating. While not a direct cause of a light not turning on, a clean fan is a well-running fan. Wipe fan blades and housing every 1-2 weeks if the fan is used daily.
Routine Inspections
Periodically checking your fan for common wear and tear signs can prevent minor issues from becoming major problems.
- Check for loose screws and connections: Monthly, visually inspect the light kit and fan housing for any loose screws or visible wires. Tighten any screws you find loose, especially on the blades and light fixtures.
- Test switches and remotes periodically: Make it a habit to cycle through your wall switches and remote control settings to ensure they are functioning smoothly. If a switch feels sticky or unresponsive, address it before it completely fails.
Frequently Asked Questions
Why is my ceiling fan light flickering?
Flickering lights often indicate loose bulbs, incorrect wattage bulbs, or loose wiring connections within the light fixture. It can also be a sign of voltage variation in your home or a failing dimmer switch not compatible with your bulbs.
Can I replace my ceiling fan light kit with any kit?
No, you need to use a replacement light kit that is compatible with your specific ceiling fan model and brand. Always check your fan’s manual or the manufacturer’s website for compatible parts to ensure proper fit and electrical function.
My ceiling fan works, but the light doesn’t. What’s the most likely problem?
If the fan operates normally but the light is out, the most likely culprits are burnt-out or loose light bulbs, a faulty pull chain for the light, a dead remote control battery, or issues with the wiring specific to the light kit. A defective wattage limiter could also be the cause for certain fan models.
How do I know if my ceiling fan has a wattage limiter?
Wattage limiters are typically found in fans manufactured between certain years, often by specific brands like Hunter (2009-2019). Your fan’s owner’s manual will specify if it includes a wattage limiter and its location, usually within the light kit housing.
Is it safe to troubleshoot ceiling fan wiring myself?
You can safely troubleshoot basic wiring issues like tightening connections or checking for loose wires, provided you always turn off power at the circuit breaker and verify with a voltage tester first. However, if you see burnt wires, smell smoke, or are uncomfortable with electrical work, it is always safest to call a professional electrician.
Conclusion
Addressing a ceiling fan light that won’t turn on often starts with simple checks like bulbs, switches, and remotes, then moves to deeper electrical inspections. Prioritizing safety by cutting power is paramount in any troubleshooting scenario for your ceiling fan light. By methodically following these steps, you can confidently diagnose and resolve many common issues, saving time and money. Remember, persistent problems or any signs of electrical hazard warrant immediate professional assistance. What easy ceiling fan maintenance tips have you found most effective in keeping your lights shining bright?