Is there anything more frustrating than a fan that’s lost its whisper? That gentle hum you once relied on for a cool breeze has morphed into a grinding, whining protest. Before you banish it to the curb, you should know that learning How To Replace Fan Motor Bearings might be the key to restoring peace and quiet. It’s a task that sounds daunting, but with a bit of patience and the right guidance, you can breathe new life into your trusty appliance. Here at Electric Fant, we believe in the longevity of good design, and that includes empowering you with the knowledge to care for the products you love. This isn’t just a repair; it’s about reconnecting with the mechanics of comfort.
The Heart of the Matter: Understanding Your Fan’s Motor
Before we roll up our sleeves, let’s talk about what’s actually making all that racket. Deep inside your fan is a motor, and within that motor are bearings. Think of them as the unsung heroes of air circulation. These small, often overlooked rings are responsible for allowing the motor shaft—the part that spins the blades—to rotate smoothly and with minimal friction. Over time, dust, debris, and simple wear and tear can cause the lubricant inside these bearings to dry up or become contaminated. When that happens, friction takes over, and you get that dreaded grinding noise.
Sleeve Bearings vs. Ball Bearings: What’s the Difference?
Most household fans, from pedestal fans to box fans, use one of two types of bearings:
- Sleeve Bearings: These are simple, cost-effective cylinders of porous metal (often bronze) soaked in oil. They are quiet when new but are more susceptible to wear and drying out over time.
- Ball Bearings: These consist of an inner and outer ring with a series of small metal balls rolling between them. They are more durable, can handle higher speeds, and are generally found in higher-quality, longer-lasting fans. They can be a bit louder than fresh sleeve bearings but maintain their performance for much longer.
Identifying the noise is the first step. A consistent, low-pitched hum is normal. A high-pitched squeal or a rough, metallic grinding sound is a clear signal that your bearings are crying out for help.
A Step-by-Step Guide on How to Replace Fan Motor Bearings
Ready to get your hands dirty? This process can bring a deeply satisfying result. Remember to take your time, keep your screws organized, and work in a well-lit area.
Disclaimer: Working with any electrical appliance carries inherent risks. Always ensure the fan is completely unplugged from the power source before you begin. If you are ever unsure or uncomfortable, please consult a qualified technician.
Step 1: Gather Your Tools
You won’t need a professional workshop, but having the right tools makes all the difference.
- Screwdriver set (Phillips and flathead)
- Pliers (needle-nose are especially helpful)
- Socket wrench set or adjustable wrench
- A small bearing puller (highly recommended, but not always necessary)
- A rubber mallet
- Replacement bearings (the most crucial part!)
- Cleaning cloths and a small brush
- A smartphone to take photos of each step for easy reassembly
Step 2: Careful Disassembly
This is where your camera comes in handy. Taking pictures as you go is the best insurance against leftover screws later.
- Unplug the Fan: This is non-negotiable. Safety first, always.
- Remove the Grilles and Blades: Start by detaching the front and rear protective grilles. They are usually held on by clips or a few screws. Then, unscrew the cap holding the fan blades to the motor shaft and gently slide the blades off.
- Access the Motor Housing: You’ll now see the motor encased in a plastic or metal housing. Look for the screws that hold the two halves of the housing together and carefully remove them.
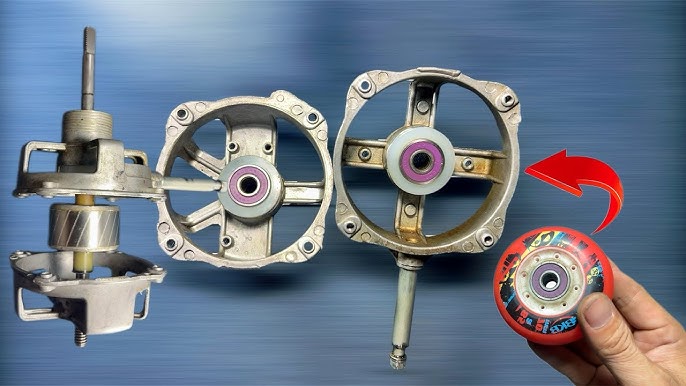
- Expose the Motor: Gently separate the housing to reveal the motor itself. You should see the motor shaft protruding from the front and back, each end supported by a bearing.
Step 3: Removing the Old Bearings
This is the most technical part of the process.
- Detach the Motor: Unscrew the motor from its mount within the housing. You may need to disconnect a few wires; take a clear photo before you do.
- Separate the Motor Case: The motor itself is in a metal case, usually held together by long bolts. Loosen and remove these bolts, and carefully separate the front and back plates from the central stator (the coiled copper part). The rotor and shaft will slide out with one of the end plates.
- Extract the Bearings: This is the moment of truth. The bearings are pressed into the center of the front and back motor plates.
- Using a Bearing Puller: This is the safest method. The tool grips the bearing and uses a central screw to pull it out cleanly.
- Without a Puller: You can try to gently tap the bearing out from the opposite side using a socket that is slightly smaller than the bearing’s outer diameter and a rubber mallet. Be very gentle to avoid warping the motor plate.
Step 4: Installing the New Bearings and Reassembly
You’re on the home stretch!
- Clean Everything: Before installing the new parts, use a brush and cloth to clean out all the dust and old grime from the motor housing and plates. A clean motor is a happy motor.
- Press in the New Bearings: Align the new bearing with the hole in the motor plate. Place a block of wood over it and gently tap it into place with your mallet until it’s fully seated. An even better method is to use a socket that matches the outer ring of the bearing to ensure you only apply pressure there.
- Reassemble in Reverse: Now, just follow your photo trail backward! Reassemble the motor, reattach it to the housing, connect any wires, close the housing, and reattach the blades and grilles.
“A well-maintained fan motor is a marvel of efficiency. The bearings are the critical contact points that determine not only the sound level but the overall energy efficiency of the unit. Replacing worn bearings isn’t just a fix; it’s a restoration of the fan’s original performance.” – Eleanor Vance, Lead Engineer at Electric Fant
Beyond the Fix: Proactive Fan Maintenance for a Longer Life
Knowing how to replace fan motor bearings is a valuable skill, but prevention is even better. Proper maintenance can dramatically extend the life of your fan and keep its performance at its peak. Think of it as a wellness routine for your home’s air circulation system.
How Can I Keep My Fan Running Smoothly?
A few simple habits can make a world of difference. Following a regular cleaning schedule prevents the dust and pet hair that can infiltrate the motor and degrade the bearing lubricant.
- Monthly Dusting: Use a soft cloth or the brush attachment on your vacuum to clean the grilles and blades.
- Seasonal Deep Clean: Two or three times a year, unplug the fan and remove the grille to wipe down the blades thoroughly. This reduces drag on the motor and improves airflow.
- Check for Wobbles: An unbalanced blade can put extra strain on the motor and bearings. If you notice a wobble, make sure the blades are securely attached and free of any caked-on grime that could throw off the balance.
- Ensure Proper Placement: Give your fan some breathing room. Placing it too close to a wall or curtains can restrict airflow, forcing the motor to work harder and generate more heat, which is the enemy of bearing lubricant.
|
Our Picks for the Best Electric Fan in 2026
As an Amazon Associate I earn from qualifying purchases.
|
||
| Num | Product | Action |
|---|---|---|
| 1 | Comfort Zone Electric Oscillating Pedestal Fan, Stand Fan, 16 inch, 3 Speed, 90 Degree Oscillating Head, Adjustable Height and Tilt, Airflow 7.48 ft/sec, Ideal for Home, Bedroom & Office, CZST161BTEBK |

|
| 2 | Vornado 630 Mid-Size Whole Room Air Circulator Fan for Home, 3 Speed Settings, Adjustable Tilt, Removable Grill, 9 Inch, Powerful Airflow, Manual Control Dial, Quiet Fan for Bedroom, Black |
|
| 3 | Lasko Oscillating Cyclone Pedestal Fan, Adjustable Height, Timer, Remote Control, 3 Speeds, for Bedroom, Living Room, Home Office, 18\", Black, 1843 |
|
| 4 | Dreo Tower Fan for Bedroom, 25ft/s Velocity Quiet Floor Fan, 90° Oscillating Fans for Indoors with 4 Speeds, 4 Modes, 8H Timer, Standing Fans, Bladeless Fan, Black, Nomad One (DR-HTF007) |
|
| 5 | EZ-CHILL 16” Oscillating Pedestal Fan, 3-speed Options, 90-Degree Oscillating Head, Adjustable Height and Tilt, Powerful Air Flow, White, MTSP15-16AZ |
|
| 6 | Dreo Fan for Bedroom, 80° Oscillating Standing Fan, 25dB Quiet, 80ft Pedestal Fans for Home Office, 90° Manual Vertical, 3 Speeds, Remote, 34-41\" Adjustable Height, Air Circulator |
|
| 7 | Amazon Basics Air Circulator Fan, Desk Fan for Bedroom, Home and Office, With 90-Degree Tilt Head, 3 Speed Settings, Lightweight (3 LBS), 35 Watts, Black, 11.1\"W x 6.3\"D x 10.9\"H |
|
| 8 | Dreo Standing Fan for Bedroom, 120°+120°Omni-directional Oscillating Fan, 85 ft Circulator With Remote, DC Motor Quiet Pedestal Fans, Adjustable Height, 8 Speeds, 3 Modes, 8H Timer, TurboPolyFan 502 |
|
| 9 | Amazon Basics 16\" Pedestal Fan with Remote, Floor Fan, Standing Fan for Bedroom, Living Room, Office, with 3 Speeds, 3 Modes, Timer, Dual-Layered Blades, Adjustable Height, Tilt Head, 60W, Black |
|
| 10 | Lasko Wind Machine Fan, Air Circulator Fan with 3 Speeds, 20\" Model 3300, Gray |
|
By integrating these simple steps, you’re not just cleaning an appliance; you’re investing in sustained comfort, better energy efficiency, and a quieter home environment. A well-cared-for fan, like our pedestal fan and tower fan models at Electric Fant, is designed to be a long-term companion in your quest for the perfect indoor climate.
Frequently Asked Questions (FAQ)
Is it cheaper to replace fan motor bearings than to buy a new fan?
For a mid-range to high-end fan, absolutely. The replacement bearings themselves often cost only a few dollars. If you’re comfortable with the DIY process, the time you invest can save you a significant amount of money compared to purchasing a new, high-quality fan. For very inexpensive fans, the cost and effort may not be worth it.
How do I find the right replacement bearings for my fan?
The best way is to find the model number on the old bearing itself. It’s usually a tiny series of numbers and letters etched onto the side. You can search for this number online to find an exact match. If you can’t read it, you’ll need to use a digital caliper to measure the inner diameter, outer diameter, and width.
Can I just lubricate the old fan bearings instead of replacing them?
Sometimes, this can be a temporary fix, especially for sleeve bearings. You can apply a few drops of specialized electric motor oil (do not use WD-40, as it’s a solvent and can make the problem worse). However, if the bearing is already grinding, it’s likely permanently damaged, and lubrication will only be a short-term solution before the noise returns.
How long should fan motor bearings last?
This depends entirely on the quality of the fan and its usage. In a high-quality fan with sealed ball bearings, they can last for many years, even with continuous use. In a cheaper fan with sleeve bearings, they might start showing signs of wear after just a year or two of heavy use.
What causes fan motor bearings to fail?
The primary culprits are dust, dirt, and heat. Dust and debris work their way into the bearing and contaminate the lubricant, turning it into a grinding paste. Heat from a hard-working motor can cause the lubricant to break down and evaporate. This is why regular cleaning is so important for fan longevity.
A Job Well Done
Congratulations! By taking on this project, you’ve not only saved a fan from the landfill but also gained a deeper appreciation for the simple, elegant engineering that goes into creating a comfortable living space. The ability to perform a repair like this is empowering, turning you from a simple user into a knowledgeable owner. Whether you’re fixing an old favorite or considering a future upgrade to a fan built for durability, understanding how to replace fan motor bearings is a skill that puts the power of comfort and quiet back into your hands.