As an essential ally against the heat, your electric fan works tirelessly to keep your home comfortable. Yet, over time, its grills inevitably become magnets for dust, pet dander, and airborne particles. This unsightly buildup not only diminishes your fan’s aesthetic appeal but also hinders its performance, circulates allergens, and can even shorten its lifespan. Understanding how to effectively remove dust from fan grills easily is key to maintaining a fresh, efficient, and healthy living environment. This guide will equip you with practical methods and expert tips to restore your fan to its pristine condition, ensuring optimal airflow and extending its operational life.
Why Clean Your Fan Grills? The Hidden Benefits
Beyond appearances, a dusty fan grill poses several problems. Accumulated dust forces your fan’s motor to work harder, consuming more energy and leading to higher electricity bills. More critically, these dust bunnies act as a breeding ground for allergens, mold, and bacteria, which are then dispersed into your indoor air with every rotation of the blades. Regular cleaning improves air quality, boosts the fan’s efficiency, and prevents potential motor strain, saving you money on repairs or replacements down the line. It’s a simple act of maintenance with significant returns for your comfort and health.
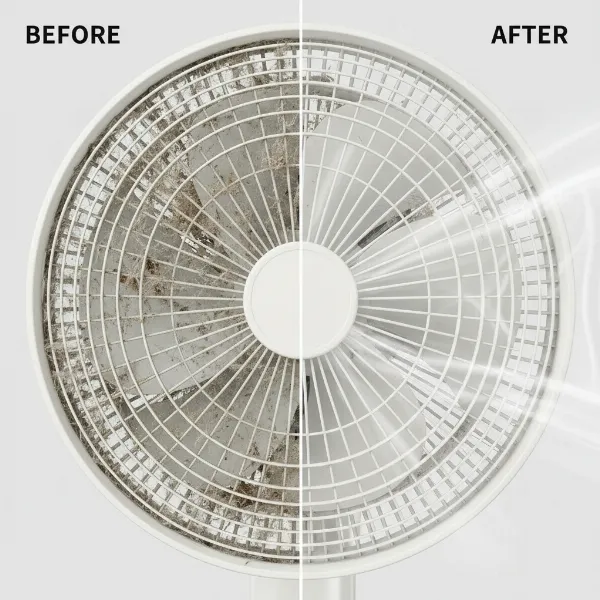 Visual comparison of a heavily dust-laden electric fan grill next to a sparkling clean one.
Safety First: Essential Precautions Before You Begin
Before embarking on any cleaning task involving electrical appliances, safety must be your top priority. Always ensure your fan is completely unplugged from its power source. This critical step prevents accidental activation and eliminates any risk of electric shock. If your fan has been running, allow the motor to cool down before handling it. Additionally, work in a well-ventilated area, especially if you plan to use cleaning solutions or compressed air, to avoid inhaling dust or fumes.
Gather Your Cleaning Arsenal: Essential Tools for Dust Removal
Having the right tools makes the cleaning process much more efficient and effective. You likely have most of these items already:
- Microfiber Cloths: Excellent for trapping dust and lint without scratching surfaces.
- Vacuum Cleaner with Brush Attachment: Ideal for suctioning loose dust from grills and blades.
- Canned Air or Air Compressor: Perfect for blasting dust out of hard-to-reach crevices, especially without disassembly.
- Soft Brushes: An old toothbrush, paintbrush, or bottle brush can reach through grills to clean blades and interior components.
- Cotton Swabs: Useful for tackling intricate designs and very tight spaces on the grill.
- Screwdriver Set: Necessary if your fan requires disassembly (check your user manual).
- Mild Cleaning Solution: A mixture of dish soap and warm water, or equal parts water and white vinegar, is often sufficient for stubborn grime. Avoid harsh chemicals.
- Pillowcase: An ingenious tool for wiping fan blades while containing dust.
How to Clean Fan Grills Without Disassembly
Cleaning your fan without taking it apart is often the quickest method for regular maintenance. While it may not achieve a deep clean, it’s effective for managing everyday dust buildup.
Step 1: Initial Dust Removal with Vacuum or Compressed Air
Begin by positioning your fan in an area where dust can be easily contained, or take it outdoors. For surface dust on the grills, use the brush attachment of your vacuum cleaner. Run it gently over the entire grill surface, both front and back, to suction away loose particles. This is particularly effective for removing larger clumps of dust and pet hair.
Alternatively, if you have canned air or an air compressor, use short, controlled bursts to blow dust out through the grill. Direct the air from the back towards the front, or vice versa, to push the dust entirely through the fan. Be prepared for a cloud of dust, so outdoor use is highly recommended for this method. For computer fans, compressed air is often the go-to solution for grill cleaning.
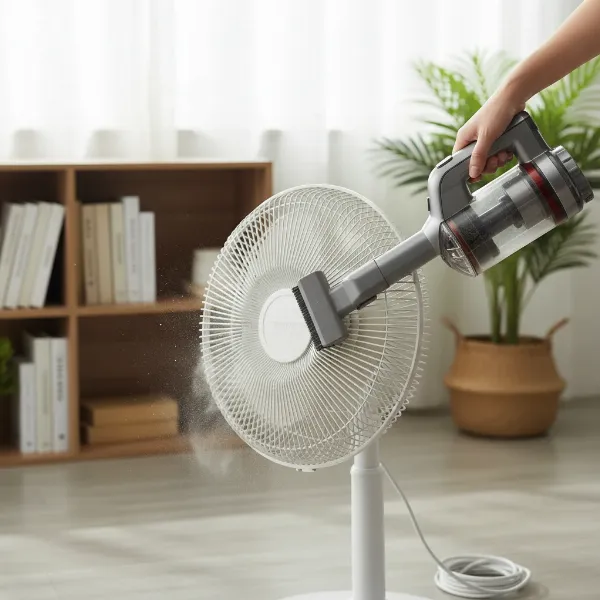 A person is using a vacuum cleaner brush attachment to clean the dusty grill of an electric fan.
Step 2: Reaching Tight Spots with Brushes and Cloths
Even after vacuuming or blowing, some dust may cling stubbornly to the grill or blades. This is where smaller tools come into play.
- Soft Brushes: An old toothbrush or a clean paintbrush can be inserted through the grill openings to gently sweep away dust from the blades and interior supports. A bottle brush is also effective for reaching deeper.
- Flexible Cloth/Ruler Method: Wrap a microfiber cloth around a thin, flexible object like a plastic ruler or a sturdy cardboard strip. Carefully slide this tool through the grill slats to wipe the surfaces of the blades and the inside of the grill.
- Cotton Swabs: For very narrow openings or intricate grill designs, cotton swabs moistened slightly with water can be incredibly precise for picking up stubborn dirt.
Step 3: Tackling Stubborn Grime with Damp Cleaning
If your fan grills have accumulated greasy film or sticky residue, simple dusting won’t suffice. Prepare a mild cleaning solution by mixing a few drops of dish soap with warm water, or combine equal parts white vinegar and water.
- Damp Cloth Wipe: Dip a microfiber cloth into the solution, wring it out thoroughly so it’s only damp, not dripping. Carefully wipe down the exterior of the fan grill. For interior grime accessible through the slats, wrap the damp cloth around a brush or ruler as described above and clean the inner surfaces. Never spray cleaning solution directly onto the fan, as moisture can damage the motor and electrical components.
- Outdoor Rinse (for heavily soiled fans): For fans with exceptionally heavy, caked-on grime and solid, non-electronic parts, some experts suggest taking the fan outdoors. Protect the motor area thoroughly with a plastic bag or plate. You can then spray a mild cleaner (like diluted dish soap or a non-abrasive all-purpose cleaner) and carefully rinse with a garden hose on a low-pressure setting. This method requires absolute certainty that no water reaches the motor or electrical components, and the fan must be left to air dry completely for at least 24-48 hours before plugging it back in.
For a Deeper Clean: Disassembling Your Fan
For a truly thorough clean, especially if your fan hasn’t been cleaned in a long time or has significant grime buildup, disassembly is the most effective approach.
Step 1: Understand Your Fan’s Construction
Before attempting to take your fan apart, consult its user manual. Different models have varying assembly methods – some grills are held by screws, others by clips or latches. Familiarize yourself with the process to avoid damaging components. Many modern fans are designed for easy, tool-free disassembly.
Step 2: Carefully Disassemble the Grill and Blades
Once you’ve identified the fastening mechanism, carefully remove the front grill. If screws are involved, keep them in a safe place. Once the front grill is off, you’ll usually find a retaining nut or cap holding the fan blades in place. Loosen this (it often turns clockwise for removal) and gently pull the blades off the motor shaft. Finally, remove the rear grill if it’s detachable, noting how it attaches. Taking pictures with your phone at each step can be a helpful reminder for reassembly.
Step 3: Wash and Wipe Components
With the grill and blades removed, cleaning becomes much simpler.
- Grill: Wash the fan grills in warm, soapy water. For stubborn dirt, use a soft brush or sponge to scrub away grime. Rinse thoroughly with clean water.
- Blades: Gently wash the fan blades. Some materials, like plastic, can be immersed in soapy water, while metal blades might require careful wiping with a damp cloth to prevent rust.
- Motor Housing: Wipe the exterior of the motor housing with a barely damp cloth. Do not use excessive water or cleaning solutions near the motor or electrical wiring. Use compressed air or a soft brush to dislodge dust from any vents on the motor housing.
Step 4: Dry Thoroughly and Reassemble
This step is crucial. Ensure all components are completely dry before reassembling your fan. Air-dry them for several hours, or even overnight, to prevent rust, mildew, and electrical hazards. Once dry, reverse the disassembly steps to put your fan back together. Double-check that all screws and fasteners are secure.
Cleaning Different Fan Types: Specific Considerations
While the general principles remain the same, certain fan types might have minor nuances in their grill cleaning:
- Table and Standing Fans: These are typically the easiest to disassemble and clean.
- Box Fans: Often have fixed front grills. The vacuum and compressed air methods are particularly useful here. For a deep clean, some box fans allow access to the blades from the back or sides.
- Tower Fans: These often have narrow, vertical slats for air intake and output. A vacuum with a crevice tool, canned air, or a thin, flexible brush are essential for cleaning their grills, as disassembly is often complex or not designed for user access.
- Ceiling Fans: Grills are typically integrated into the motor housing. Use an extendable duster or a vacuum with an extension wand to reach and clean them from a sturdy ladder. The pillowcase method is excellent for dusting ceiling fan blades without spreading dust.
“A clean fan isn’t just about aesthetics; it’s about optimizing airflow, reducing energy consumption, and significantly improving the air quality in your living space.” – Lauren Houser, Cleaning Expert, Zep Inc.
Maintaining a Dust-Free Environment: Prevention Tips
Regular cleaning is the best defense against dust buildup. Aim to dust your fan grills every few weeks and perform a deeper clean seasonally.
- Regular Dusting: Incorporate fan grills into your routine dusting schedule. A quick wipe with a microfiber cloth can prevent heavy accumulation.
- Dust-Repelling Sprays: After cleaning, you can apply a dust-repelling spray to the fan blades and grills. Some suggest a DIY solution of one part liquid fabric softener to four parts water, sprayed onto a cloth and then wiped onto the surfaces.
- Air Purifiers: Using an air purifier in your home can significantly reduce the amount of airborne dust that your fan pulls in, keeping its grills cleaner for longer.
- Strategic Placement: Placing fans away from high-traffic, dusty areas or pet zones can also help reduce the rate of dust accumulation.
Expert Tips for Pristine Fan Grills
- Frequency is Key: Small, regular cleaning efforts are far easier than tackling years of caked-on grime.
- Check the Manual: Always consult your fan’s manual for specific cleaning instructions and disassembly procedures.
- Mind the Motor: Remember the golden rule: keep water and cleaning solutions away from the fan’s motor and electrical components.
- Consider Fan Covers: When storing fans during off-seasons, use a fan cover to protect them from dust.
Conclusion
Keeping your fan grills clean is a simple yet impactful maintenance task that yields numerous benefits, from enhanced performance and energy efficiency to improved indoor air quality. Whether you opt for a quick surface clean or a thorough disassembly, the methods outlined in this guide provide a clear path to effortlessly remove dust and restore your fan to its optimal condition. By making fan grill cleaning a regular part of your home care routine, you ensure that your electric fan continues to deliver a refreshing breeze without spreading unwanted dust and allergens.
What steps will you take today to keep your fan grills sparkling clean and your air fresh?
Frequently Asked Questions
How often should I clean my fan grills?
It’s recommended to lightly dust your fan grills every 2-4 weeks, and perform a more thorough, deep clean (with or without disassembly) every 1-3 months, depending on usage, environmental dust levels, and the presence of pets or allergens.
Can I use water to clean my fan?
You can use water mixed with mild soap or vinegar to clean detachable fan grills and blades, provided they are thoroughly dried afterward. However, never spray water or cleaning solutions directly onto the fan’s motor or electrical components, as this can cause damage or electrical hazards.
What is the best way to clean a fan without taking it apart?
The most effective methods for cleaning a fan without disassembly involve using a vacuum cleaner with a brush attachment, compressed air to blow out dust, or a damp microfiber cloth wrapped around a thin tool (like a ruler or paintbrush) to wipe through the grill slats.
Why does my fan get so dusty?
Fans attract dust because their rotating blades create static electricity and circulate air, drawing in airborne particles such as dust, pet dander, and fibers. These particles then get trapped on the fan grills and blades due to static and airflow patterns.
Is it safe to put a fan under running water?
Only certain components, like detachable plastic grills and blades, can be safely washed under running water with soap. The motor, electrical wiring, and any non-removable parts should never be submerged or exposed to running water directly. Always ensure all parts are completely dry before reassembly and use.