Imagine stepping into a room with a magnificent vaulted ceiling, feeling the airy expanse—only to realize it’s stifling hot and installing a ceiling fan seems like an impossible task. High, sloped ceilings, while adding architectural grandeur, often pose unique challenges for homeowners looking to enhance comfort with a ceiling fan. The good news is that with the right approach, tools, and understanding, installing an electric fan on a high sloped ceiling is not just possible, but a rewarding DIY project that significantly improves air circulation and aesthetics.
This comprehensive guide will walk you through every step, from selecting the right fan and essential tools to the detailed installation process and crucial safety measures. We’ll empower you to tackle this project with confidence, transforming your challenging space into a comfortable oasis.
Understanding Sloped Ceilings and Ceiling Fans
Sloped ceilings, also known as vaulted or cathedral ceilings, create an open, expansive feel in any room. However, their angular design means a standard flush-mount ceiling fan won’t hang level or operate efficiently. The key challenge lies in achieving a stable, vertical hang for the fan, ensuring its blades have adequate clearance from the ceiling and surrounding walls. Without proper installation, a fan on a sloped ceiling can wobble excessively, make noise, or even become a safety hazard.
The primary solution for sloped ceilings involves specialized mounting systems. Many modern ceiling fans are designed to accommodate slopes up to 45 degrees, often including a ball-and-socket mounting system that allows the downrod to hang plumb even when the mounting bracket is angled. For steeper pitches, a dedicated sloped ceiling adapter is essential. This adapter creates a level surface for the fan’s canopy, ensuring the fan hangs correctly and operates smoothly.
Tools and Materials Required for Installation
Before you begin, gather all necessary tools and materials to ensure a smooth and safe installation. Working on a high ceiling means you’ll need a stable, tall ladder or scaffolding, prioritizing safety above all else.
Essential Tools:
- Sturdy Ladder or Scaffolding: For safe access to high ceilings.
- Voltage Tester: To confirm power is off.
- Phillips and Flathead Screwdrivers: For various screws on the fan and electrical box.
- Wire Strippers/Cutters: For preparing electrical wires.
- Pliers: For tightening nuts and bending wires.
- Stud Finder: To locate ceiling joists for secure mounting.
- Measuring Tape: For determining downrod length and clearances.
- Adjustable Wrench: For tightening bolts.
- Drill with Assorted Bits: For pre-drilling holes if necessary.
- Safety Glasses: To protect your eyes from debris.
|
Our Picks for the Best electric fan in 2026
As an Amazon Associate I earn from qualifying purchases.
|
||
| Num | Product | Action |
|---|---|---|
| 1 | LEVOIT Tower Fan for Bedroom, 25ft/s Velocity Standing Fan with 28dB Quiet for Sleep, Remoter, 12H Timer, 5 Speeds, 4 Modes, 90° Oscillation for Home, Office, Indoor, Bladeless 36 inch, White |

|
| 2 | Amazon Basics Air Circulator Fan, Desk Fan for Bedroom, Home and Office, With 90-Degree Tilt Head, 3 Speed Settings, Lightweight (3 LBS), 35 Watts, Black, 11.1\"W x 6.3\"D x 10.9\"H |
|
| 3 | Dreo Tower Fan for Bedroom, 25ft/s Velocity Quiet Floor Fan, 90° Oscillating Fans for Indoors with 4 Speeds, 4 Modes, 8H Timer, Standing Fans, Bladeless Fan, Black, Nomad One (DR-HTF007) |
|
| 4 | Dreo Fan for Bedroom, 12 Inches, 70ft Powerful Airflow, 28db Quiet Table Air Circulator Fans for Whole Room, 120° Adjustable Tilt, 3 Speeds, Desktop Fan for Home, Office, Kitchen |
|
| 5 | Dreo Fan for Bedroom, 120° Oscillating Standing Fans, Quiet Floor Fan with DC Motor, 100ft Pedestal Fans for Room, 9 Speeds, 4 modes, 20dB, 120° Manual Vertical, 37-42\" Adjustable Height, 9H Timer |
|
| 6 | Amazon Basics 16\" Pedestal Fan with Remote, Floor Fan, Standing Fan for Bedroom, Living Room, Office, with 3 Speeds, 3 Modes, Timer, Dual-Layered Blades, Adjustable Height, Tilt Head, 60W, Black |
|
| 7 | Lasko 2520 Oscillating Stand Fan,White 16 Inch |
|
| 8 | Dreo Tower Fan for Bedroom, 90° Oscillating Standing Fans for Room with 4 Speeds, 3 Modes, 28dB Quiet for Sleep, 25ft/s Velocity, 8H Timer, Remote, Living Room, Office, Home, Black |
|
| 9 | 10\" Modern Standing Fan for Bedroom, Sleek Oscillating Pedestal Fan, 3-Speed & Height Adjustable Compact Floor Fan for Home Office & Dorm |
|
| 10 | Amazon Basics 20\" High Velocity Industrial Fan, Floor Fan, with 3 Speeds, Tilt Head, ETL-Listed Safety Compliance, Metal Housing/Blades, Ideal for Industrial/Commercial Space/Garage/Gym, 125W, Black |
|
Necessary Materials:
- Ceiling Fan: Ensure it’s rated for sloped ceiling installation.
- Sloped Ceiling Adapter (if needed): Check your fan’s specifications and ceiling angle.
- Appropriate Downrod: Longer than standard for high ceilings, matching the fan’s finish and diameter.
- Fan-Rated Electrical Box: Must be securely mounted to a ceiling joist or blocking to support the fan’s weight (typically 35-50 lbs).
- Wire Nuts: For safe electrical connections.
- Electrical Tape: For securing connections.
- Toggle Bolts or Heavy-Duty Screws: If additional support is needed for the electrical box.
Choosing the Right Ceiling Fan for a Sloped Ceiling
Selecting the correct electric fan is paramount for a successful installation on a high sloped ceiling. Compatibility and proper sizing are critical for both functionality and aesthetic appeal.
Fan Pitch Compatibility
Most ceiling fans can accommodate a sloped ceiling up to 30 degrees using their standard mounting hardware. However, for slopes exceeding 30 degrees (often up to 45 degrees), you will need a specialized sloped ceiling adapter. Always check the fan’s specifications and manufacturer instructions to confirm its maximum compatible angle and whether an adapter is required.
Downrod Length Considerations
For high ceilings, the downrod length is crucial. Fan blades should ideally be positioned between 8 to 9 feet from the floor for optimal airflow and safety. On high sloped ceilings, this often means requiring a much longer downrod than typically supplied with standard fans. Measure your ceiling height accurately from the floor to the fan’s mounting point, then subtract the desired blade height (8-9 feet) to determine the approximate downrod length needed. Additionally, ensure the blades maintain at least 18 inches of clearance from the closest sloped wall to prevent striking and ensure efficient air circulation.
Weight Capacity of the Electrical Box
A ceiling fan is heavier and exerts more force than a simple light fixture. Therefore, it requires a fan-rated electrical box, designed to support the fan’s weight and dynamic motion. These boxes are typically rated for 35-50 pounds and must be securely attached to a ceiling joist or a sturdy brace between joists. Never rely on a standard light fixture box, as it could lead to the fan falling.
Importance of Checking Fan Specifications
Every ceiling fan model has unique installation requirements. Carefully read the manufacturer’s instructions for your specific fan. These instructions will detail the maximum ceiling slope the fan can handle, the type of mounting hardware included, and any additional accessories like sloped ceiling adapters that may be necessary for your installation.
 Modern ceiling fan mounted on a high sloped ceiling, demonstrating proper downrod length and clearance
Step-by-Step Installation Guide
Installing a ceiling fan on a high sloped ceiling requires meticulous attention to detail and safety. Follow these steps carefully to ensure a secure and functional setup.
1. Safety First: Turning Off Power
Before touching any wires, ALWAYS turn off the power to the circuit at your home’s main electrical breaker panel. Do not rely solely on a wall switch. Use a voltage tester to confirm that the power is indeed off at the fan’s location before proceeding. This is the most critical safety step.
2. Locating and Preparing the Electrical Box
If you have an existing electrical box, check if it is fan-rated and securely mounted to a ceiling joist. If not, you must replace it with a new fan-rated box. Use a stud finder to locate a ceiling joist or solid wood blocking. If no suitable support exists, install a fan-rated brace between two joists. The box must be able to support the fan’s weight.
3. Installing the Mounting Bracket/Sloped Ceiling Adapter
Attach the fan’s mounting bracket or the sloped ceiling adapter directly to the fan-rated electrical box using the screws provided. Ensure it is firmly secured. If using a sloped ceiling adapter, follow its specific instructions for installation, as these are designed to provide a level hanging point for the fan’s downrod despite the ceiling angle. Some mounting brackets have a ball-and-socket design that allows for the angle without a separate adapter.
4. Assembling the Fan Motor and Downrod
Carefully feed the electrical wires from the fan motor through the downrod. Attach the downrod securely to the fan motor assembly, following the manufacturer’s instructions. There is usually a pin and set screw to lock the downrod in place.
5. Hanging the Fan Motor
This step can be challenging due to the fan’s weight and the height. With assistance if possible, lift the fan assembly and hook the hanger ball at the end of the downrod into the mounting bracket. The ball should sit snugly in the bracket’s receptacle, allowing the fan to hang freely while you make the electrical connections. Ensure the slot in the hanger ball engages with the tab on the mounting bracket to lock it in place and prevent spinning.
6. Making Electrical Connections
Connect the fan’s wires to your home’s electrical wiring according to standard color codes:
- Green or Bare Copper: Ground wire to ground wire.
- White: Neutral wire to neutral wire.
- Black (or other color): Hot wire(s) to hot wire(s).
Use wire nuts to secure each connection, twisting them tightly. Wrap electrical tape around each wire nut and connection for added security.
7. Securing the Canopy and Blades
Once wiring is complete, carefully slide the canopy up the downrod and secure it to the mounting bracket with the screws provided. This covers the wiring connections. Next, attach the fan blades to the motor housing according to the manufacturer’s instructions. Ensure all screws are tightened to prevent wobbling.
8. Testing the Fan
After all components are secured, restore power at the circuit breaker. Turn on the fan using its wall switch or remote control. Check for proper operation, including all speeds and light functions. Observe the fan for any excessive wobbling. Minor wobbling can often be corrected with a blade balancing kit.
Troubleshooting Common Installation Issues
Even with careful installation, you might encounter a few common issues. Here’s how to address them:
Wobbling Fan
A wobbling fan is the most frequent complaint. It can be caused by:
- Loose Blades: Check that all blade screws are tightened.
- Unbalanced Blades: Use a blade balancing kit (often included with the fan) to identify and correct imbalances.
- Loose Downrod: Ensure the downrod set screw and pin are securely fastened.
- Improper Mounting: Verify the mounting bracket is firmly attached to the ceiling joist/blocking and the hanger ball is correctly seated in the bracket.
- Incorrect Downrod Length: If the downrod is too short, the fan may be too close to the sloped ceiling, causing turbulence and wobble.
Fan Not Turning On
- No Power: Double-check the circuit breaker. Use a voltage tester to confirm power at the electrical box.
- Loose Wiring: Ensure all electrical connections (ground, neutral, hot) are secure and correctly matched with wire nuts.
- Remote/Wall Switch Issues: Test the remote control or wall switch. If a dimmer switch was previously installed for a light fixture, it might not be compatible with the fan motor and needs to be replaced with a standard on/off switch.
- Motor Issues: If all else fails, there might be a problem with the fan’s motor, requiring professional service or replacement.
Noise Issues
- Loose Components: Tighten all screws on blades, light kits, and canopy.
- Fan Rubbing: Ensure no wires or parts are touching the canopy or motor housing.
- Motor Hum: A slight hum is normal for some motors, but excessive noise might indicate an issue with the motor or installation.
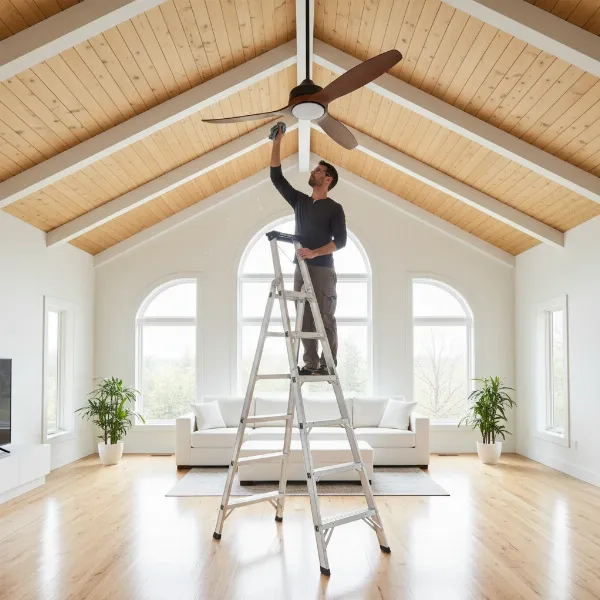 Person cleaning a ceiling fan on a high sloped ceiling, emphasizing maintenance and safety
Tips for Optimal Performance and Safety
Once your electric fan is successfully installed on your high sloped ceiling, a few practices will ensure its optimal performance and longevity.
Regular Maintenance
- Cleaning: Regularly dust the fan blades and motor housing. Accumulated dust can create imbalances and reduce airflow. Always turn off power before cleaning.
- Checking Fasteners: Periodically check that all screws and bolts on the blades, downrod, and mounting bracket are tight. Vibrations from operation can sometimes loosen fasteners over time.
Ensuring Proper Clearance
- Blade-to-Wall Clearance: Always maintain at least 18 inches of clearance between the fan blades and any walls or sloped ceiling surfaces. This prevents turbulence and ensures efficient air circulation.
- Blade-to-Floor Height: Keep the fan blades at least 7 feet from the floor for safety, with 8 to 9 feet being ideal for optimal cooling. For high ceilings, this typically means using a longer downrod.
Professional Consultation
While installing a ceiling fan on a high sloped ceiling is a manageable DIY project for experienced homeowners, don’t hesitate to consult a professional electrician if you encounter complex wiring, structural concerns, or simply feel uncomfortable with any part of the process. Electrical work can be dangerous, and ensuring safety is paramount.
“Installing a ceiling fan on a sloped ceiling can greatly enhance comfort and energy efficiency. The critical steps are choosing a compatible fan and downrod, securing a fan-rated electrical box, and ensuring all connections are solid and safe.” – John Smith, Master Electrician at Volt & Flow Solutions.
Conclusion
Installing an electric fan on a high sloped ceiling might initially seem daunting, but with careful planning, the right equipment, and a step-by-step approach, it’s a rewarding project that transforms your living space. By understanding the unique requirements of sloped ceilings, choosing a compatible fan and accessories, and prioritizing safety throughout the installation, you can successfully enhance airflow and comfort in your home. Remember that meticulous attention to downrod length, blade clearance, and a secure, fan-rated electrical box are the pillars of a safe and efficient installation.
Ready to take control of your indoor climate and enjoy the refreshing breeze? What improvements will a perfectly installed ceiling fan bring to your high-ceilinged room?
Frequently Asked Questions
Can any ceiling fan be installed on a sloped ceiling?
No, not all ceiling fans are suitable for sloped ceilings. You need a fan specifically designed for angled mounting or one that can accommodate a sloped ceiling adapter. Always check the manufacturer’s specifications for the maximum ceiling pitch the fan can handle.
How do I determine the correct downrod length for a high sloped ceiling?
Measure the height from the floor to where the fan will be mounted. Your fan blades should be 8-9 feet from the floor for optimal performance. Subtract this ideal blade height from your ceiling height to determine the approximate downrod length needed. Factor in the fan’s height from the downrod to the blades.
Is a special electrical box required for sloped ceiling fan installation?
Yes, a fan-rated electrical box is essential. Standard electrical boxes are not designed to support the weight and dynamic motion of a ceiling fan, especially on a sloped surface. The fan-rated box must be securely mounted to a ceiling joist or a brace for safety and stability.
What is a sloped ceiling adapter and when is it needed?
A sloped ceiling adapter is a component that creates a level mounting surface for your fan’s canopy when the ceiling angle is too steep for the fan’s standard mounting bracket. It’s typically needed for slopes exceeding 30 degrees, ensuring the fan hangs vertically and operates without issues.
How much clearance should a ceiling fan have from the sloped ceiling and walls?
The fan blades should be at least 18 inches from the closest wall or sloped ceiling surface to prevent turbulence and ensure efficient airflow. For safety, the fan blades must also be at least 7 feet above the floor, with 8 to 9 feet being the recommended height for optimal air circulation.