Is your trusty electric fan pushing more dust than cool air? Over time, these essential home appliances accumulate layers of grime on their blades and grilles, hindering performance and potentially circulating allergens. A dirty fan not only works less efficiently, but it can also strain the motor and shorten its lifespan. Fortunately, giving your pedestal fan a thorough deep clean is a straightforward process that can restore its cooling power and enhance your indoor air quality. This comprehensive guide will walk you through every step, from safe disassembly to meticulous cleaning and reassembly, ensuring your fan runs like new.
Why Your Pedestal Fan Craves a Deep Clean
Regular cleaning of your pedestal fan is more than just an aesthetic choice; it’s crucial for both your comfort and the appliance’s longevity.
Improved Air Quality
When dust, pet dander, and other airborne particles settle on fan blades and grilles, the fan acts as a mini-blower, scattering these irritants throughout your room every time it’s switched on. A clean fan helps circulate genuinely fresh air, which is vital for those with allergies or respiratory sensitivities.
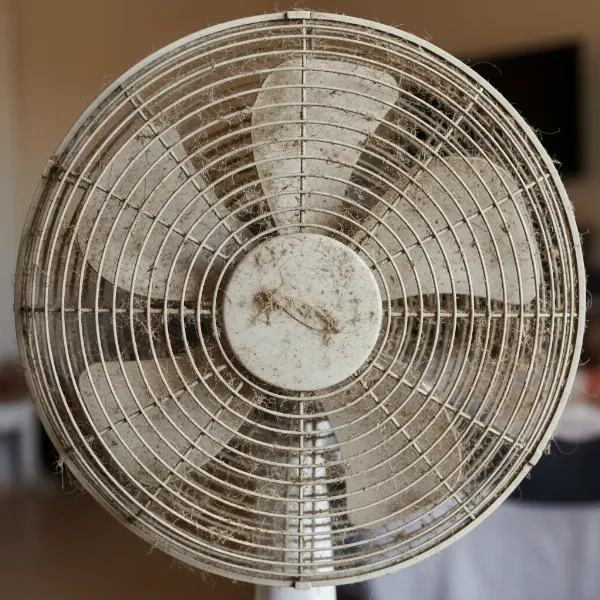 Close-up of dirty pedestal fan blades covered in thick dust and grime, showing need for cleaning.
Enhanced Efficiency and Cooling Power
Even a thin layer of dust creates drag on the fan blades, forcing the motor to work harder to achieve the same rotation speed. This reduced efficiency means less airflow and a diminished cooling effect, leading to higher energy consumption and a less comfortable environment. Clean blades cut through the air more effectively, delivering a powerful, refreshing breeze.
Extended Lifespan of Your Fan
Overworking a motor due to dirty blades or obstructed vents can lead to overheating and premature wear and tear. By keeping your fan clean, you reduce this strain, helping the motor run smoothly and significantly extending the overall lifespan of your electric fan. This saves you money in the long run by delaying the need for a replacement.
Preventing Motor Strain and Noise
Accumulated debris around the motor housing can also impede ventilation, causing the motor to heat up unnecessarily. This can lead to increased operational noise and potentially trigger safety features that shut the fan off. A clean fan operates more quietly and reliably.
Essential Tools and Materials for Fan Cleaning
Before you begin, gather these common household items to ensure a smooth and efficient cleaning process:
- Screwdriver Set: You’ll likely need a Phillips head screwdriver, and possibly a flathead, depending on your fan model’s grille fastenings.
- Microfiber Cloths or Soft Rags: Several clean cloths for wiping down surfaces.
- Mild Dish Soap or All-Purpose Cleaner: Gentle cleaning agents that won’t damage plastic or metal.
- Warm Water: For mixing with detergent and rinsing.
- Small Brush: An old toothbrush or a soft-bristled paintbrush is excellent for reaching tight spots.
- Vacuum Cleaner with Brush Attachment (Optional): Useful for removing loose dust from grilles and motor vents before wet cleaning.
- Compressed Air Can (Optional): Ideal for blasting dust out of intricate motor vents without introducing moisture.
- Small Container: To safely store screws and small parts, preventing them from getting lost.
Safety First: Before You Begin Disassembly
Your safety is paramount. Always prioritize it when dealing with electrical appliances.
“Always start by disconnecting the fan from the power,” cautions Alicia Sokolowski, co-CEO of AspenClean.
- Unplug the Fan: This is the most critical step. Ensure the fan is completely disconnected from any power source before touching it.
- Choose Your Workspace: Move the fan to an open, well-lit area where you can comfortably work, such as a large table or on the floor covered with an old sheet or towel to catch dust and drips.
Step-by-Step Disassembly of Your Pedestal Fan
Pedestal fan designs vary, but the general disassembly process remains consistent. Take photos with your phone as you go if you’re worried about remembering how to reassemble it.
- Remove the Front Grille/Cover:
- Examine the front grille. Some models use clips around the circumference that can be gently unlatched. Others may have small screws (often Phillips head) securing the grille in place.
- Carefully remove any screws and place them immediately into your small container. Release the clips and detach the front grille.
- Detaching the Blade Cap or Nut:
- Locate the cap or nut in the center of the fan blades, typically covering the motor shaft.
- This cap usually twists off. Many have an arrow indicating “LOCK” and “UNLOCK” or “OPEN” and “CLOSE.” Twist it in the “UNLOCK” or “OPEN” direction (often counter-clockwise).
- Once loosened, remove the cap and add it to your screw container.
- Carefully Removing the Fan Blades:
- The fan blades should now slide directly off the motor shaft. They might be snug, but should not require excessive force. If they don’t budge, double-check if there’s an additional locking mechanism.
- Set the blades aside gently to avoid bending or damaging them.
- Unscrewing the Rear Grille:
- Behind the blades, you’ll find the rear grille, which protects the motor. This is often held in place by several screws, an interlocking ring, or a combination of both.
- Remove any screws or twist the locking ring (often counter-clockwise) to detach the rear grille from the motor housing. Store any screws.
- (Optional) Separating the Fan Head from the Stand/Base:
- For easier cleaning and maneuverability, you might wish to separate the entire fan head from its pedestal stand and base. This usually involves loosening a knob or screw at the top of the stand.
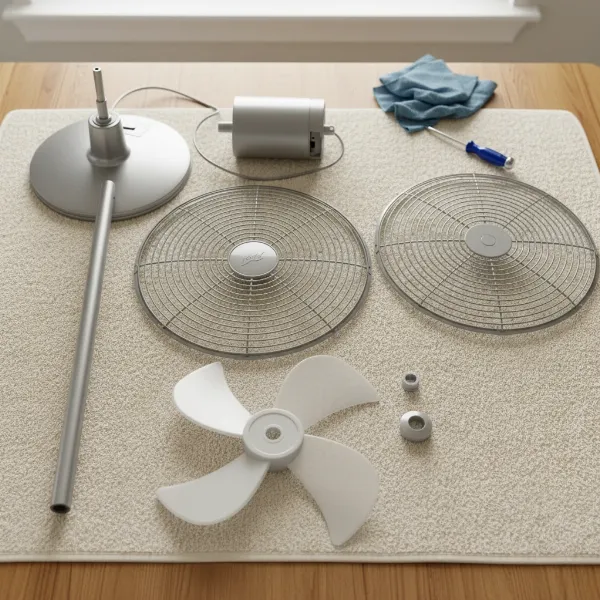 Various disassembled components of a pedestal fan laid out on a clean surface, ready for cleaning.
Thorough Cleaning of Each Component
Now that your fan is disassembled, it’s time to tackle the dust and grime.
Grilles and Blades
These are the parts that accumulate the most dust and benefit most from a wet clean.
- Preparation: Take the grilles and blades to a sink, bathtub, or large bucket.
- Wash with Soapy Water: Fill your sink or bucket with warm water and a few drops of mild dish soap or all-purpose cleaner. Submerge the grilles and blades.
- Scrub Stubborn Dirt: Use a soft brush, sponge, or an old toothbrush to gently scrub away accumulated dust and stubborn dirt from all surfaces. For heavily caked-on grime, you can let the parts soak for a few minutes to loosen the debris.
- Rinse Thoroughly: Rinse each component under clean, cool running water to remove all soap residue.
- Dry Completely: This step is crucial. Use a clean, dry microfiber cloth to wipe down every surface. Then, allow the parts to air-dry completely for at least 30 minutes, or until there is absolutely no moisture left. Placing them in a breezy area can speed up the process. Do not proceed with reassembly if any part is still damp.
Motor Housing and Control Panel
The motor area requires a different approach to avoid electrical damage.
- Wipe with a Damp Cloth: Lightly dampen a microfiber cloth with water (or a mild cleaner diluted in water). Ensure the cloth is barely damp, not dripping wet.
- Clean Exterior Surfaces: Carefully wipe down the exterior of the motor housing, the control panel, and any buttons to remove dust and smudges.
- Address Vents: For dust accumulated within the motor vents, use the brush attachment of your vacuum cleaner to gently suction out debris. Alternatively, a can of compressed air can effectively blow dust out of hard-to-reach crevices.
- Critical Warning: > “Be sure not to get the cloth too wet to prevent water from seeping into the fan’s motor or electrical components,” advises cleaning expert Marla Mock. “Do not use water or cleaning solutions directly on the motor.” Water in the motor can cause electrical shorts and destroy your fan.
Stand and Base
These parts often collect floor grime and general household dust.
- Wipe Down: Use a damp cloth, possibly with a little mild detergent, to wipe down the entire stand and base. Pay attention to any nooks and crannies where dust might settle.
- Dry: Ensure the stand and base are thoroughly dry before moving the fan or plugging it back in.
Reassembly: Putting Your Pedestal Fan Back Together
Once all components are sparkling clean and completely dry, it’s time to reassemble your fan. Work in reverse order of disassembly.
- Attach the Rear Grille: Align the rear grille with the motor housing, ensuring it fits correctly. Secure it with its screws or by twisting the locking ring until tight.
- Mount the Fan Blades: Carefully slide the fan blades back onto the motor shaft. They should fit snugly into place.
- Secure the Blade Cap/Nut: Replace the blade cap or nut onto the motor shaft and twist it in the “LOCK” or “CLOSE” direction (often clockwise) until it is secure. Ensure it’s tight enough to prevent blade wobble but don’t overtighten.
- Reattach the Front Grille/Cover: Align the front grille with the rear grille and secure it with its clips or screws.
- (Optional) Reattach Fan Head to Stand: If you separated the fan head, reattach it to the pedestal stand and tighten any knobs or screws.
- Final Checks and Testing: Double-check that all screws are tightened and clips are secured. Plug the fan back into the power outlet and test it on various speed settings. Enjoy the smooth, quiet operation and powerful breeze!
Maintenance Tips for a Cleaner Fan Longer
To keep your pedestal fan performing at its best, incorporate these tips into your routine:
- Regular Dusting: A quick weekly wipe-down of the grilles and blades with a dry microfiber cloth can significantly reduce dust buildup, making deep cleaning less frequent.
- Strategic Placement: Position your fan away from high-dust areas, such as directly behind heavily trafficked doorways or near open windows on windy days.
- Seasonal Deep Cleans: Aim for a thorough deep clean at least quarterly, or more frequently if you use your fan daily, live in a dusty environment, or have pets.
- Consult Your Manual: Always refer to your fan’s user manual for model-specific disassembly and cleaning instructions, especially for unique designs.
Common Mistakes to Avoid When Cleaning Your Fan
- Forgetting to Unplug: This is the most dangerous mistake. Always unplug the fan first.
- Using Abrasive Cleaners: Harsh chemicals or scrubbers can scratch surfaces or corrode plastic, weakening the fan’s components.
- Getting the Motor Wet: Never spray water directly onto the motor or submerge any electrical components.
- Reassembling Damp Parts: Moisture can lead to electrical shorts, rust, or mold growth within the fan. Ensure everything is bone dry.
- Misplacing Screws: Keep all small parts in a designated container during disassembly.
- Overtightening: Be gentle when reassembling; overtightening screws or nuts can strip threads or crack plastic.
Conclusion
A clean pedestal fan isn’t just about aesthetics; it’s about optimizing performance, ensuring healthier air, and extending the life of your appliance. By following these detailed steps to safely disassemble, meticulously clean, and correctly reassemble your electric fan, you can breathe easier and enjoy a consistently powerful, refreshing breeze. Taking a little time for this essential maintenance will make a significant difference in your home’s comfort and air quality. What difference did a deep clean make for your cooling comfort this season?
Frequently Asked Questions
How often should I clean my pedestal fan?
For optimal performance and air quality, aim to deep clean your pedestal fan every 2-4 weeks during regular use. If you use it less frequently or have a very clean environment, a monthly clean might suffice. Regular light dusting can help extend the time between deep cleans.
Can I use any cleaning solution on my fan blades?
It’s best to use a mild liquid detergent mixed with warm water, or a gentle all-purpose cleaner. Avoid abrasive cleaners, strong chemicals, or solvents like bleach or alcohol, as these can damage the plastic or finish of the blades and grilles.
Is it safe to get the fan motor wet?
No, absolutely not. The fan motor is an electrical component and should never come into contact with water or cleaning solutions. Always use a dry or barely damp cloth to clean the motor housing and consider compressed air for vents to avoid any moisture damage or electrical hazards.
What if my fan has stubborn dirt build-up that won’t come off?
For persistent grime on grilles and blades, allow them to soak in warm, soapy water for 10-15 minutes before scrubbing. A soft brush, like an old toothbrush, can help dislodge stubborn dirt from intricate areas. Ensure thorough rinsing and drying afterward.
How can I prevent dust from accumulating so quickly on my fan?
Regular, light dusting of your fan’s exterior and grilles can slow down dust accumulation. Positioning your fan away from very dusty areas, using an air purifier in the room, and regularly vacuuming your living space can also help reduce the amount of airborne dust that settles on your fan.