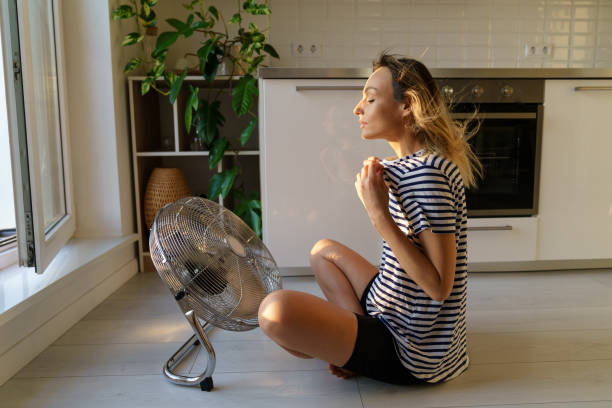
There’s nothing quite like the gentle breeze of a fan on a warm day. But what if that comforting breeze is secretly stirring up trouble? If you’re an allergy sufferer, you know the struggle all too well. This article is your ultimate guide on How To Sanitize Fan For Allergy Sufferers, transforming your trusty cooling companion from a dust-distributor into a true ally for cleaner, more comfortable air. We’ve all been there: you turn on your fan hoping for relief, and instead, you’re met with a tickle in your throat and an unstoppable urge to sneeze. It’s frustrating, and it feels like a betrayal. The truth is, a fan that isn’t properly sanitized can become a spinning repository for dust, pollen, pet dander, and mold spores—the very things you’re trying to avoid.
Here at Electric Fant, we believe that comfort is about more than just temperature. It’s about creating a healthy, breathable environment in your home. We’ve spent years engineering fans that not only circulate air efficiently but are also designed with your well-being in mind. So, let’s roll up our sleeves and get that fan truly, deeply clean. It’s easier than you think, and the difference it makes for your respiratory health is night and day.
Why a “Clean” Fan Just Isn’t Enough for Allergies
You might wipe down your fan blades every now and then, and that’s a great start. But for someone with allergies, there’s a world of difference between “visibly clean” and “sanitized.” Think of your fan as the lungs of your room; it inhales and exhales air constantly. Over time, a sticky, microscopic film of grime builds up on the blades and grilles.
This film is a magnet for common indoor allergens:
- Dust mites: These microscopic critters thrive on dead skin cells, which are a major component of household dust.
- Pollen: It sneaks in through open windows and doors, hitching a ride on your clothes and pets.
- Pet dander: Those tiny flecks of skin shed by your furry friends can be a major trigger.
- Mold spores: In humid environments, mold spores can settle and even grow on dusty fan surfaces.
When you turn on a fan coated with these allergens, you’re essentially launching them into the air at high speed, creating an allergen storm right in your living room or bedroom. That’s why learning how to sanitize fan for allergy sufferers isn’t just a cleaning chore; it’s a critical health habit.
What Tools Do You Need to Properly Sanitize a Fan?
Before you start, gathering the right tools will make the job much faster and more effective. You likely have most of these items at home already. No fancy equipment is needed, just a bit of elbow grease.
Here’s your sanitizing toolkit:
- A screwdriver (usually a Phillips head)
- A vacuum cleaner with a brush attachment
- Microfiber cloths (at least two)
- A bucket or a bathtub for soaking
- Warm water
- Mild dish soap
- White vinegar (our natural sanitizing secret weapon)
- An old toothbrush or small scrub brush
- Canned air (optional, but helpful for tight spots)
Your Step-by-Step Guide on How to Sanitize Fan for Allergy Sufferers
Ready to breathe easier? We’ll break down the process for a standard pedestal or box fan. The principles are the same for most models, but always check your fan’s manual if you’re unsure about disassembly.
Step 1: Safety First, Always
This is non-negotiable. Before you do anything else, unplug your fan from the wall outlet. Never attempt to clean a fan while it’s connected to a power source. It’s a simple step that prevents any risk of electric shock or accidental startup.
Step 2: Careful Disassembly
Most fans are designed for easy cleaning. Look for clips or screws that hold the front grille (or cage) in place.
- Carefully unfasten the clips or unscrew the screws holding the front grille. Set them aside in a small bowl so you don’t lose them.
- Gently remove the front grille.
- The fan blades are often attached with a cap that unscrews. Important: Most fan blade caps are reverse-threaded, meaning you’ll turn it clockwise to loosen and counter-clockwise to tighten.
- Slide the blades off the motor shaft.
- Finally, remove the rear grille, which is usually held on by a plastic nut around the motor shaft.
Step 3: The Pre-Clean Dry Run
Before introducing any water, let’s get rid of the loose dust. Use your vacuum’s brush attachment to go over all the parts you just removed—both grilles and the fan blades. This prevents you from turning that dry dust into a muddy mess when you start washing.
Step 4: The Sanitizing Soak
This is where the magic happens.
- Fill your bucket or bathtub with enough warm water to submerge the grilles and blades.
- Add a few drops of mild dish soap and about one cup of white vinegar. Vinegar is a fantastic natural disinfectant that helps break down grime and kill mold spores without harsh chemicals.
- Place the grilles and blades into the solution and let them soak for about 15-20 minutes. This gives the solution time to work on that stubborn, sticky buildup.
- After soaking, use a microfiber cloth or a soft brush to wipe away any remaining grime. An old toothbrush is perfect for getting into the tight spaces of the grilles.
- Rinse all parts thoroughly with clean water to remove any soap and vinegar residue.
Step 5: Tending to the Body and Motor
While the other parts are drying, turn your attention to the fan’s body.
- Use the vacuum brush to clear dust from the motor housing vents. This is crucial for performance and preventing overheating.
- If needed, use canned air to blow out any dust from inside the motor housing that the vacuum can’t reach.
- Dampen a microfiber cloth with a 50/50 solution of water and vinegar. Wring it out well—it should be damp, not dripping.
- Carefully wipe down the entire fan body, including the stand, base, and control panel. Never spray liquid directly onto the motor or electrical components.
As our lead engineer, Maria Flores, often says, “A clean motor is a happy motor. Dust is the number one enemy of performance and longevity. Keeping those vents clear not only improves air quality but also helps your fan run more efficiently and last longer.”
Step 6: Dry and Reassemble
Patience is key here. Every single part must be 100% dry before you put the fan back together. Any lingering moisture can lead to mold growth—the very thing we’re trying to prevent—or even damage the electrical components. Lay the parts on a towel or place them in a well-ventilated area to air dry completely.
Once everything is bone-dry, reassemble your fan in the reverse order of how you took it apart. Your reward is a fan that looks brand new and circulates genuinely fresh air.
|
Our Picks for the Best Electric Fan in 2026
As an Amazon Associate I earn from qualifying purchases.
|
||
| Num | Product | Action |
|---|---|---|
| 1 | Amazon Basics 16\" Pedestal Fan with Remote, Floor Fan, Standing Fan for Bedroom, Living Room, Office, with 3 Speeds, 3 Modes, Timer, Dual-Layered Blades, Adjustable Height, Tilt Head, 60W, Black |

|
| 2 | Dreo Tower Fan for Bedroom, 25ft/s Velocity Quiet Floor Fan, 90° Oscillating Fans for Indoors with 4 Speeds, 4 Modes, 8H Timer, Standing Fans, Bladeless Fan, Black, Nomad One (DR-HTF007) |
|
| 3 | Comfort Zone Electric Oscillating Pedestal Fan, Stand Fan, 16 inch, 3 Speed, 90 Degree Oscillating Head, Adjustable Height and Tilt, Airflow 7.48 ft/sec, Ideal for Home, Bedroom & Office, CZST161BTEBK |
|
| 4 | Dreo Standing Fan for Bedroom, 120°+120°Omni-directional Oscillating Fan, 85 ft Circulator With Remote, DC Motor Quiet Pedestal Fans, Adjustable Height, 8 Speeds, 3 Modes, 8H Timer, TurboPolyFan 502 |
|
| 5 | Dreo Fan for Bedroom, 80° Oscillating Standing Fan, 25dB Quiet, 80ft Pedestal Fans for Home Office, 90° Manual Vertical, 3 Speeds, Remote, 34-41\" Adjustable Height, Air Circulator |
|
| 6 | Vornado 630 Mid-Size Whole Room Air Circulator Fan for Home, 3 Speed Settings, Adjustable Tilt, Removable Grill, 9 Inch, Powerful Airflow, Manual Control Dial, Quiet Fan for Bedroom, Black |
|
| 7 | Lasko Wind Machine Fan, Air Circulator Fan with 3 Speeds, 20\" Model 3300, Gray |
|
| 8 | Lasko Oscillating Cyclone Pedestal Fan, Adjustable Height, Timer, Remote Control, 3 Speeds, for Bedroom, Living Room, Home Office, 18\", Black, 1843 |
|
| 9 | Amazon Basics Air Circulator Fan, Desk Fan for Bedroom, Home and Office, With 90-Degree Tilt Head, 3 Speed Settings, Lightweight (3 LBS), 35 Watts, Black, 11.1\"W x 6.3\"D x 10.9\"H |
|
| 10 | EZ-CHILL 16” Oscillating Pedestal Fan, 3-speed Options, 90-Degree Oscillating Head, Adjustable Height and Tilt, Powerful Air Flow, White, MTSP15-16AZ |
|
Advanced Sanitizing Tips for Every Fan Owner
Now that you’ve mastered the basics of how to sanitize fan for allergy sufferers, let’s elevate your clean air game.
How Often Should I Sanitize My Fan?
This depends on your environment and sensitivity.
- For moderate allergy sufferers: A deep sanitization once every 4-6 weeks during peak season is a good rule of thumb.
- For severe allergy sufferers or homes with pets: You may want to sanitize it every 2-3 weeks.
- Off-season: A quick wipe-down and vacuuming once a month should suffice.
What About Fans I Can’t Disassemble, Like Tower Fans?
Tower fans and some bladeless models present a unique challenge. While you can’t soak their parts, you can still clean them effectively.
- Unplug the unit.
- Use your vacuum’s crevice and brush tools to remove as much dust as possible from the air intake and output vents.
- Use a long, flexible duster designed for cleaning appliances to reach inside the vents.
- Use canned air to blow out any remaining stubborn dust. Do this outdoors if possible to avoid blowing the dust around your room.
- Wipe the exterior with a damp, vinegar-solution cloth.
This is where choosing the right fan from the start makes a difference. Many of Electric Fant’s modern tower fans are designed with removable grilles specifically to make this process easier for health-conscious users.
Frequently Asked Questions
Can a dirty fan really make my allergies worse?
Absolutely. A dirty fan aerosolizes dust, pollen, and pet dander that has settled on its blades, circulating these irritants throughout the room and increasing your exposure, which can directly trigger or worsen allergy and asthma symptoms.
How often do I need to sanitize my fan if I have pets?
If you have pets that shed, you should aim to sanitize your fan more frequently. Pet dander and hair can clog a fan quickly. We recommend a deep clean every 2-4 weeks to maintain good air quality and keep your fan running efficiently.
Is it okay to use bleach to sanitize my fan?
We strongly advise against using bleach or other harsh chemical cleaners. They can damage the plastic and metal finishes on your fan and may release fumes that can be irritating to your respiratory system, defeating the purpose of cleaning for allergy relief. A simple solution of vinegar and water is both effective and safe.
What’s the best type of fan for someone with allergies?
Tower fans or bladeless fans can be great options as their design often keeps the blades more enclosed, reducing the amount of dust that settles on them. However, the most important feature is how easy the fan is to clean. Look for models with easily removable grilles and blades, a feature we prioritize in our product designs.
Is it better to use a fan or an air conditioner for allergies?
Both have pros and cons. Air conditioners can filter air, but they also need regular filter cleaning to be effective. Fans circulate air, which is great for preventing stagnant air where allergens can settle. The best approach is often using both strategically. A clean, sanitized fan helps circulate the cool, filtered air from your AC more effectively.
A Breath of Fresh Air is a Healthier Life
Taking the time to properly clean and sanitize your fan is one of the most impactful things you can do to improve your indoor air quality and manage allergy symptoms. It’s more than just a chore; it’s an act of self-care. By following this guide on how to sanitize fan for allergy sufferers, you’re taking control of your environment and ensuring that every breeze in your home is a clean, refreshing, and healthy one. Now, you can enjoy the simple pleasure of a cooling fan without a side of sneezes and sniffles.